Predator’s Eyesight: 5 Tips For Using Thermal Scopes

The thermal scope, one of hunting’s most fascinating pieces of technology.

If you’ve clicked on this article today, then you’ve likely either purchased yourself one of these bad boys, or you’re considering it. Great! But how familiar are you with such innovative technology? How much help do you need before you get ready to use one of these yourself?

If you’re someone asking yourself these kinds of questions, then you’re in the right place!

First Off, What is Thermal Imagery?

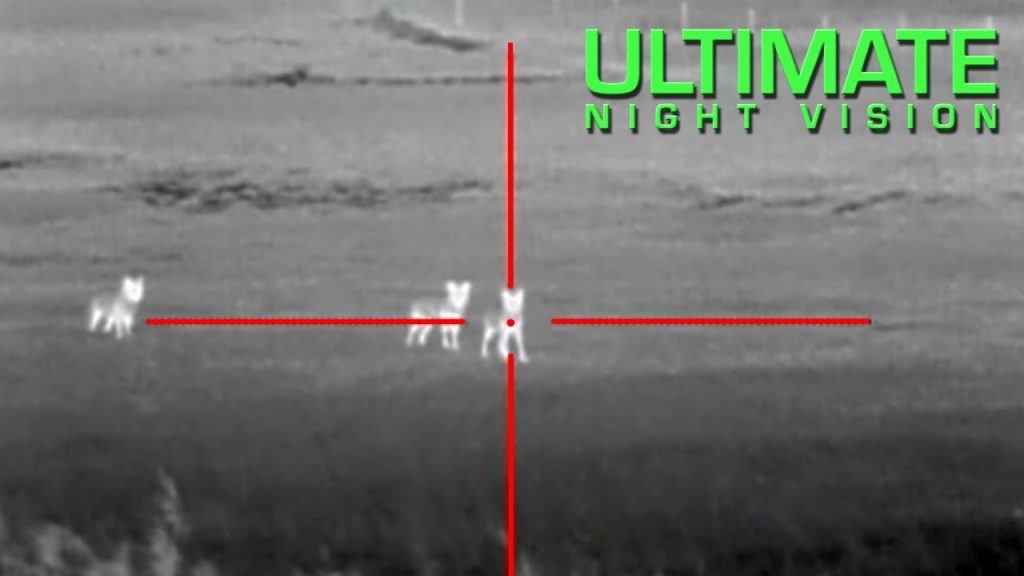
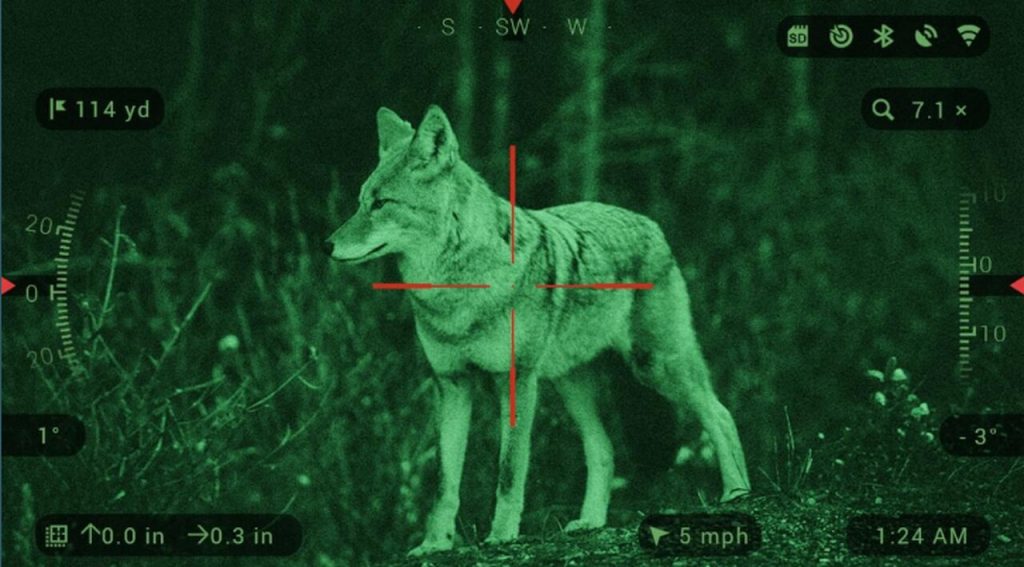
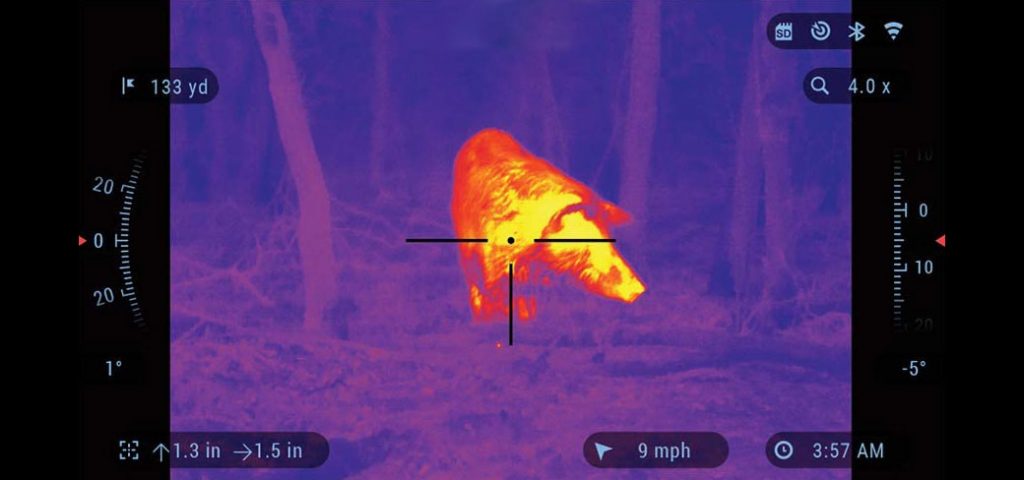
Thermal imagery, or thermography, refers to infrared imagery. Infrared images are often dark initially, only lighting up when objects with enough heat or radiation generated in them get caught in the camera/scope’s view. Thermal scopes work similarly to normal night vision devices, which soak up light particles instead of heat or radiation.

In our opinion, however, thermal scopes are much better than night vision scopes. Thermal scopes are far more capable of capturing the target of your desires while night vision can certainly illuminate them, but with much less accuracy. Thermal imagery can be used in many different ways. Besides the obvious activity of hunting, this technology can often be found in surveillance cameras as well as medical equipment.

Our Five Pointers

If you’ve clicked on this article, chances are high that you’re looking to use your thermal scope for hunting. To this observation, I say congratulations! You’re on the right track to mastering thermal imagery by knowing what you’re going to do with your new scope and when you want to use it. But ideas can only go so far without any formal research to back you up!

Thankfully, we’ve got you covered.

Scroll down to read our top five pointers for using thermal scopes!

Tip #1: Basics, Basics, Basics. We’ve thankfully already been over the differences between thermal scopes and standard night vision scopes. But be sure you never get the two mixed up, otherwise you might accidentally break your device when trying to use it at the wrong place and time! So just to refresh your memory, thermal scopes catch heat and can be used at basically any time of day. Night vision, on the other hand, catch light and can ONLY be used at night.

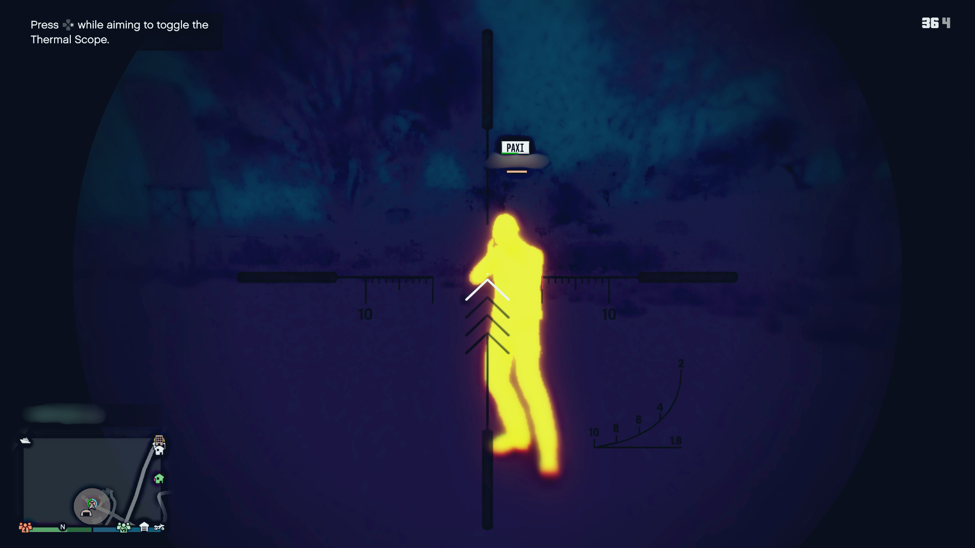
Tip #2: Don’t Get Too Overwhelmed. For most of you, the first time you ever witnessed the look of thermal imagery was probably when you watched the first Predator movie. The alien in particular was specifically bred to be a good hunter because he could literally see every inch of his targets in movement through the use of his enhanced eyesight. He never had to worry about overstimulation, so long as nobody could find him and hurt him. Too bad thermal imagery doesn’t QUITE work like that in real life!

In fact, the more realistic truth behind thermal imagery is that overstimulation is more than possible. We are only human, after all. So when using your thermal scope, train yourself to be able to make out specific images so that nothing gets too confusing.

Tip #3: Zeroing Practice. We get it, sighting your rifle while simultaneously using a thermal scope can be tricky. And since most people don’t shoot at paper targets in the middle of night, objects with some semblance of heat in them are what show up in thermal scans. With this being said, try making use of a metal target whenever you’re testing your scope.

Tip #4: Calibration Is Key. Calibrating a scope isn’t rocket science, but it can still prove to be confusing to newcomers. Imagine scrolling through your Facebook feed and notice that your sister has posted thirty-two new images of your infant nephew. You try to click on the album to load up the photos, but it doesn’t load! What do you do to fix the problem? You hit the refresh button at the top of your browser and reload the page, of course.

Calibrating a thermal scope works the same way. Even high-grade technology has the tendency to lag up whenever you least want it to. For newbie hunters, this can be very overwhelming in the middle of a big hunt. Our recommendation is purchasing a scope with continuous calibration, so that you don’t have to worry about doing it yourself.

Tip#5: Eye Training. Specialized night vision devices, whether pertaining to thermal imagery or standard night vision, are capable of emulating some particularly bright lights and colors. Unless you’ve got the world’s strongest set of eyes, chances are very high that you won’t be able to stand the brightness for too long of a time. With this in mind, it helps to train your eyes so you can adapt to the strange world which can only be seen through the lens of a thermal scope. A good method to use is starting out small and short, like using your thermal scope to identify objects in your closet or basement when the lights are out. When you’re comfortable with smaller spaces, you can level up to larger spaces like your backyard.

Unlock the full potential of your hunting or surveillance experience with the latest in thermal and night vision technology! I recommend you to visit usfclass.com to learn more about how these innovative scopes can enhance your capabilities.

Thermal Vs. Night Vision Rifle Scope – Which one to choose for night hunting

Worldwide, the choice between night vision rifle scopes Vs. thermal rifle scopes are always a popular topic among recreational shooters and hunters. Thermal imaging scope is a more expensive technology compared to night vision devices. 

Thermal Vs. Night Vision Rifle Scope

Wondering about the difference between thermal rifles and night vision scopes? You have found the right place! This article provides a comparative analysis of the technology behind both rifle scopes and will help you make a favorable decision. But first, let’s discuss their functions!

How Does the Night Vision Device Work?

Night Vision view

The night vision binocular first came about in WWII, introduced by the German army in 1939, and has witnessed tremendous technological advancement since then. These advancements are rated in Gen 1, 2, or 3 categories.

As the name suggests, the top rated night vision optic enables users to see in the dark. However, it is worth noting that it relies upon ambient light from the surroundings to generate an image. It does not function in complete darkness or daylight. It functions in low light conditions by amplifying ambient light in the dark. Night vision scope can use IR Illuminator to generate light In the absence of natural light. But you don’t have to worry: They are not visible light to the naked eyes, hence cannot scare away your target.

Night vision devices let you see images up to a thousand yards away, which would have been impossible to do with your naked eyes. While both have similar technology, the functionality depends on your night vision device.

The traditional night vision binoculars work by taking ambient light from the objective lens. At this stage, it is called photons. The photons are converted into electrons and amplified in the image intensifier tube; this then passes through a screen inside the scope covered in phosphor and is converted back into the light to create an object or image for the user. This image typically displays in green and black.

While the digital night vision rifle scope is the more advanced technology of the night vision scope, this electronically enhanced digital imaging system grants the viewer superior image detail and a more detailed view compared to traditional night vision devices. It works by capturing visible light through its objective lens, which then gets processed with a coupler device that transmits an image onto the LCD screen in a black and white representation.

One of the advantages of the digital night vision rifle scope is precise imaging. Unlike traditional night vision devices, you can also use them during the daytime. Now, let’s consider thermal riflescopes.

How Does Thermal Riflescope Work?

Thermal view

Thermal rifle scope differs from night vision devices that only operate in the dark, relying on ambient light. The more advanced thermal binoculars can function effectively day and night in most conditions except for the extreme cold. 

A thermal riflescope works by picking up the heat signatures from its object and comparing them to each other. All objects around send some infrared radiation. This radiation is picked by the thermal imaging scopes, which transform into thermal images on the screen. Again, unlike night vision devices, the best thermal scope can spot a camouflaged target or targets behind a barrier. 

While night vision optics portray its target in a higher resolution, almost rendering an actual image, the thermal images use various colors to depict their target, from black and white to varying shades of red and blue, illustrating heat from an animal or human. Many hunters favor using the thermal rifle scope as it enables them to see through tall grass, fogs, vegetation, storms, harsh weather (except extreme cold), and obstacles that could act as barriers. In addition, thermal binocular covers more distance than night vision binoculars.

So,  what are the pros and cons of thermal imaging and night vision scope? 

  • Pricing

Pricing is one of the most significant factors most hunters consider in choosing a scope. It is no surprise that thermal images being the newer and more advanced scope, are costlier. Though most favor thermal rifle scope over night vision devices, not many hunters can afford such a high price for quality best thermal scope. 

Night vision optic has been around for a while before thermal optic. It is available in various generations and models that would suit most users’ requirements and are budget-friendly.

  • Imaging 

Night vision devices offer more vivid image quality with better details, especially when you want identification of your mark, such as facial identification. Night vision optic has an edge over thermal images here, as the latter, though an excellent game detector, portrays its image representation in blobs of color. Another positive advantage of a night vision device is its capability to function in extreme cold and heat, contrary to thermal scope. 

On the other hand, thermal images are a master at detecting games in most conditions. It is more efficient in spotting targets behind barriers, camouflage, fog, smoke, vegetation, storms, fire, in still motion, and covering a longer distance. A night vision device may not be able to function under such circumstances, even to spot stationary targets.

  • Daylight 

A more detailed image is one advantage of night vision binoculars over thermal binoculars. The former are primarily ineffective in daylight, bright light conditions could damage their internal components, and their function is exclusively for nighttime use. The thermal monocular does not require such conditions to function, as it does not rely on minimal available light to operate. Specific new generation high-end night vision scopes can now perform in daylight use, but the thermal scope remains more compatible to function in dual-day use.

  • Durability

The consensus among hunters is that though both devices are reliable and durable, the night vision scope is more enduring. The night vision rifle further edges the thermal riflescope on longer battery life and is lighter to carry. 

Both devices have critical components that need looking out for to ensure their longevity, as both can withstand .30 caliber recoil. The standard for caring for them is not leaving the battery inside for a long time. In addition, cover optics with a glass filter whenever possible to avoid dirt and scratches, put lens covers on when not in use, and handle with care. 

Thermal Rifle Scope Vs. Night Scope Considerations 

Other potential factors can help you determine your choice of rifle optics, as the debate between thermal rifle scope vs night vision rifle scope ultimately comes down to them.

Your purpose, the hunting environment, and shooting conditions are vital considerations. If your concern is for personal security purposes, tactical purposes, or recreational shooting, thermal imaging is advisable for its twenty-four-hour reliability.

For hunting purposes, you must consider what environment you will be hunting in and the shooting conditions. The thermal scope is your best option for dialing in and shooting from extreme distances as it has more capacity to cover longer distances. Thermal monoculars are also more valuable if you hunt in fog, tall grass, or thick bush because they can detect and track a game from behind an obstacle, unlike night vision technology.

Nonetheless, night vision technology is a more bankable option if your hunting happens in places with colder conditions. Thermal monoculars’ ability to detect heat signatures declines under such weather. There is also the issue of regulations when deciding on the thermal rifle scope and night vision scope.

Some countries prohibit using thermal imaging devices for hunting some species. So if hunting is your purpose for deciding on a thermal imaging device, it will be wise first to research your local regulations. It is imperative to do your research on the devices available to you, know what to expect, and discover which best suits your needs. You can read a more details guide about thermal scope from Accurate Ordnance.

Final Thoughts

Whichever side of the debate you support, you’ll agree that thermal vision Vs. night vision has massively changed the hunting experience for the better. There is no question that both optics are luxury on a night hunting trip. Remember,  the thermal optics can be used to spot and track the heat of the desired game, even from an extreme distance, while you can use the night vision scope for identification. 

Besides being luxurious devices, they are essential for tactical setups and personal security. They also come in handy for nocturnal varmint and pest control.

References:
https://accurateordnance.com/thermal-scope-vs-night-vision/

https://www.thetruthaboutguns.com/irayusa-announces-new-bolt-c-series-thermal-rifle-scopes/

How to sight in an ATN Night Vision scope

The ATN X-Sight II is another exquisite product that uses the most advanced technology
and good quality optics to bring about some of the best and most versatile
optics obtainable for sporting.

This unit functions both in the daytime and in the night vision, enabling shooters and hunter’s elongate time spent in the field by just pushing a button. The capabilities of both vision optics make this an amazing product but ATN didn’t just leave it at that. The X-Sight has features not seen on rifle scopes, the future of sport optics indeed.

The ATN X-Sight II weighs about 2.2 lbs. and is solid in construction. Its base frame and battery cover is made of aluminum except lens cap and eye cup which are made of rubber latex. It is coated with a coating for any weather that shields the optics and other elements, making them ready for whatever conditions you may encounter on the field.

This ATN has an Obsidian core processor with a perceptive user interface that enables you set up your X-Sight quickly. It is said to be easier than set up in a smartphone and can be customized. Getting your X-Sight to work is a walkover. The Obsidian core makes sure that the high resolution image sensor gives you the best in terms of clear and crispy images.

Unique Features of X-Sight ATN

A unique feature of the ATN X-Sight Smart HD is the One Shot Zero ability. It has High Definition Optic Day- Night Rifle scope.

There are a myriad of reticle options to pick from, ability to record full High Definition videos and the choice of a 3-14x or 5-20x sight. Zooming is done by pushing large buttons on top. Other features include:

Night vision

Although the X-Sight can be used in both day and night time, most people use it exclusively in night vision, a great way to go into the game at night. The night vision capabilities of the X-Sight are unquantifiable based on its price and uniqueness. It has excellent image quality and is not like the conventional night vision unit. When compared with the PVS-14, the X-Sight has better output and image quality, with the introduction of an IR illuminator.

The range of your X-Sight can be improved with the addition of an aftermarket illuminator. IR lasers provide an excellent way to point out targets while in night vision mode.

Accessories

It makes use of 4AA batteries that run for about 8 hours when lithium batteries are in use. It’s advisable to carry a USB battery pack if you’re going on long hunts or using the X-Sight for different days. There is compatibility between the USB packs and the X-Sight but is recommended to take an ATN power kit with you that uses a battery, USB cord and butt stock case in one. When fully charged, the USB battery pack can last twice as long as disposable batteries.

You can also switch from the regular green gradient to black and white night vision mode. An observation is that in black and white, clearer contrast can be seen and targets identified easily using this mode. It is indeed the best option for night vision units available in the market. My friend from modern huntsman creates a great article for night vision scope guides, you can check it out for the detail.

How to use an ATN Night vision scope

  1. Align the sight of your rifle manually or using a laser for bore sighting.
  2. Set the coordinates, X and Y to 0 and reset to factory settings.
  3. Select a sight, probably beginning from a 100 yards and zoom in at base magnification(very important)
  4. Ensure to shoot targets at the center from a steady point.
  5. Open the Zero Setup screen
  6. Click on the Enter key at the center twice
  7. Highlight the Menu button using arrow buttons and press Enter
  8. Press Display
  9. Select Reticle
  10. Click on Zero Setup
  11. Put down your initial X and Y coordinates.
  12. Aim your rifle at the initial target point.

Move the reticle to the bullet hole using the arrow buttons, while maintaining original point of aim. As you move the aim dots, your X and Y coordinates tend to change in differences of 4.

Keep the initial dot in sight over point of aim after positioning this dot on the impact hole, and then press Enter. Go back to the main screen using the left arrow key. Confirm your point of impact and aim by firing another shot. By this time, you may hit the bulls eye or CLOSE to it. You can zoom in to get a clearer picture.

Once original sighting is completed, make adjustments by repeating the procedure all over at a higher zoom greater than the normal scope magnification by half.

The coordinates in the X and Y direction will increase by 1 to enable better granular refining of impact point. Ensure to put down your new X and Y coordinates in case the scope is reset. This enables you input them again, while you zero your rifle without firing.

Benefits of using the ATN X-Sight night vision scope

Some of the benefit of using the ATN X-Sight night vision scope is that it is cost effective. But this does not compromise on quality and durability as well. It is designed for hard functions with a durable weatherproof coating capable of withstanding any conditions you may face in the field. You can zero your X-Sight with just one shot, saving time and ammunition.

All you have to do is enter the sight, fire a shot at your target, identify the point of impact and aim for the same spot using the buttons on top of the scope to determine your point of impact. Press save. The computer resets it and zeroes you. You’re set to go!

You can store multiple zero profiles as well. This ATN unit also has an inbuilt Wi-Fi connectivity, allowing you pair your sight with an Android or IOS device. Cool right? With this, you can share your hunting experience with your hunting pal and they get to see what you see through the optic too. This makes it a great choice for stand hunting and target shooting using a spotter.

It is a useful tool for training new hunters. A new hunter can watch and learn how and where to aim when this ATN unit is paired to a tablet. It teaches them a great deal in targeting and taking on game in a humanely while experiencing every part of the hunt, from when you spot the game to the aftermath of the shot.

Check this guide to know see comparison of thermal and night vision scope.